
I’ve never hiked Lesueur Ridge before. Actually, until recently, I had never even heard of it. But, lured by the prospect of a snow-free ridge walk offering great views of the front range of the Rockies, I decided yesterday was the day to give it a shot.
The trailhead is located approximately 40km from Cochrane. Follow Highway 1A west until you reach Highway 40 aka the Forestry Trunk Road. From there you turn north and follow the road past the village of Waiparous. Just beyond where the pavement ends and Capture the Flag paintball, you turn west along what is known locally as TransAlta Road. The trailhead is approximately 3km down this rough but easily passable road. No need for a four wheel drive to get here. There is ample room for parking. Set your GPSr for N51° 15.953′ W114° 57.985′ and you should be fine.
It was sunny and 8 Celsius when I reached the trailhead around 10:00.
The trail is easily visible and heads off to the north, following the barbed wire fence. After about 300m, the fence and the trail turn to your right and you will start moving in a northeasterly direction. This is where you encounter your first real elevation gain. Another 300m or so and you’ll reach a plateau. This will be your first real opportunity to get a good look at the mountains to the west.
You’ll also see a trail heading to the west. I recommend not following it and instead continue straight ahead to the north. Not only will doing the loop in a counter-clockwise direction allow you to gain the elevation over a series of summits, but it will keep those great views in front of you as you climb, rather than behind your back the whole way.
The trail heading west here is the one we’ll come back on as we complete the loop.
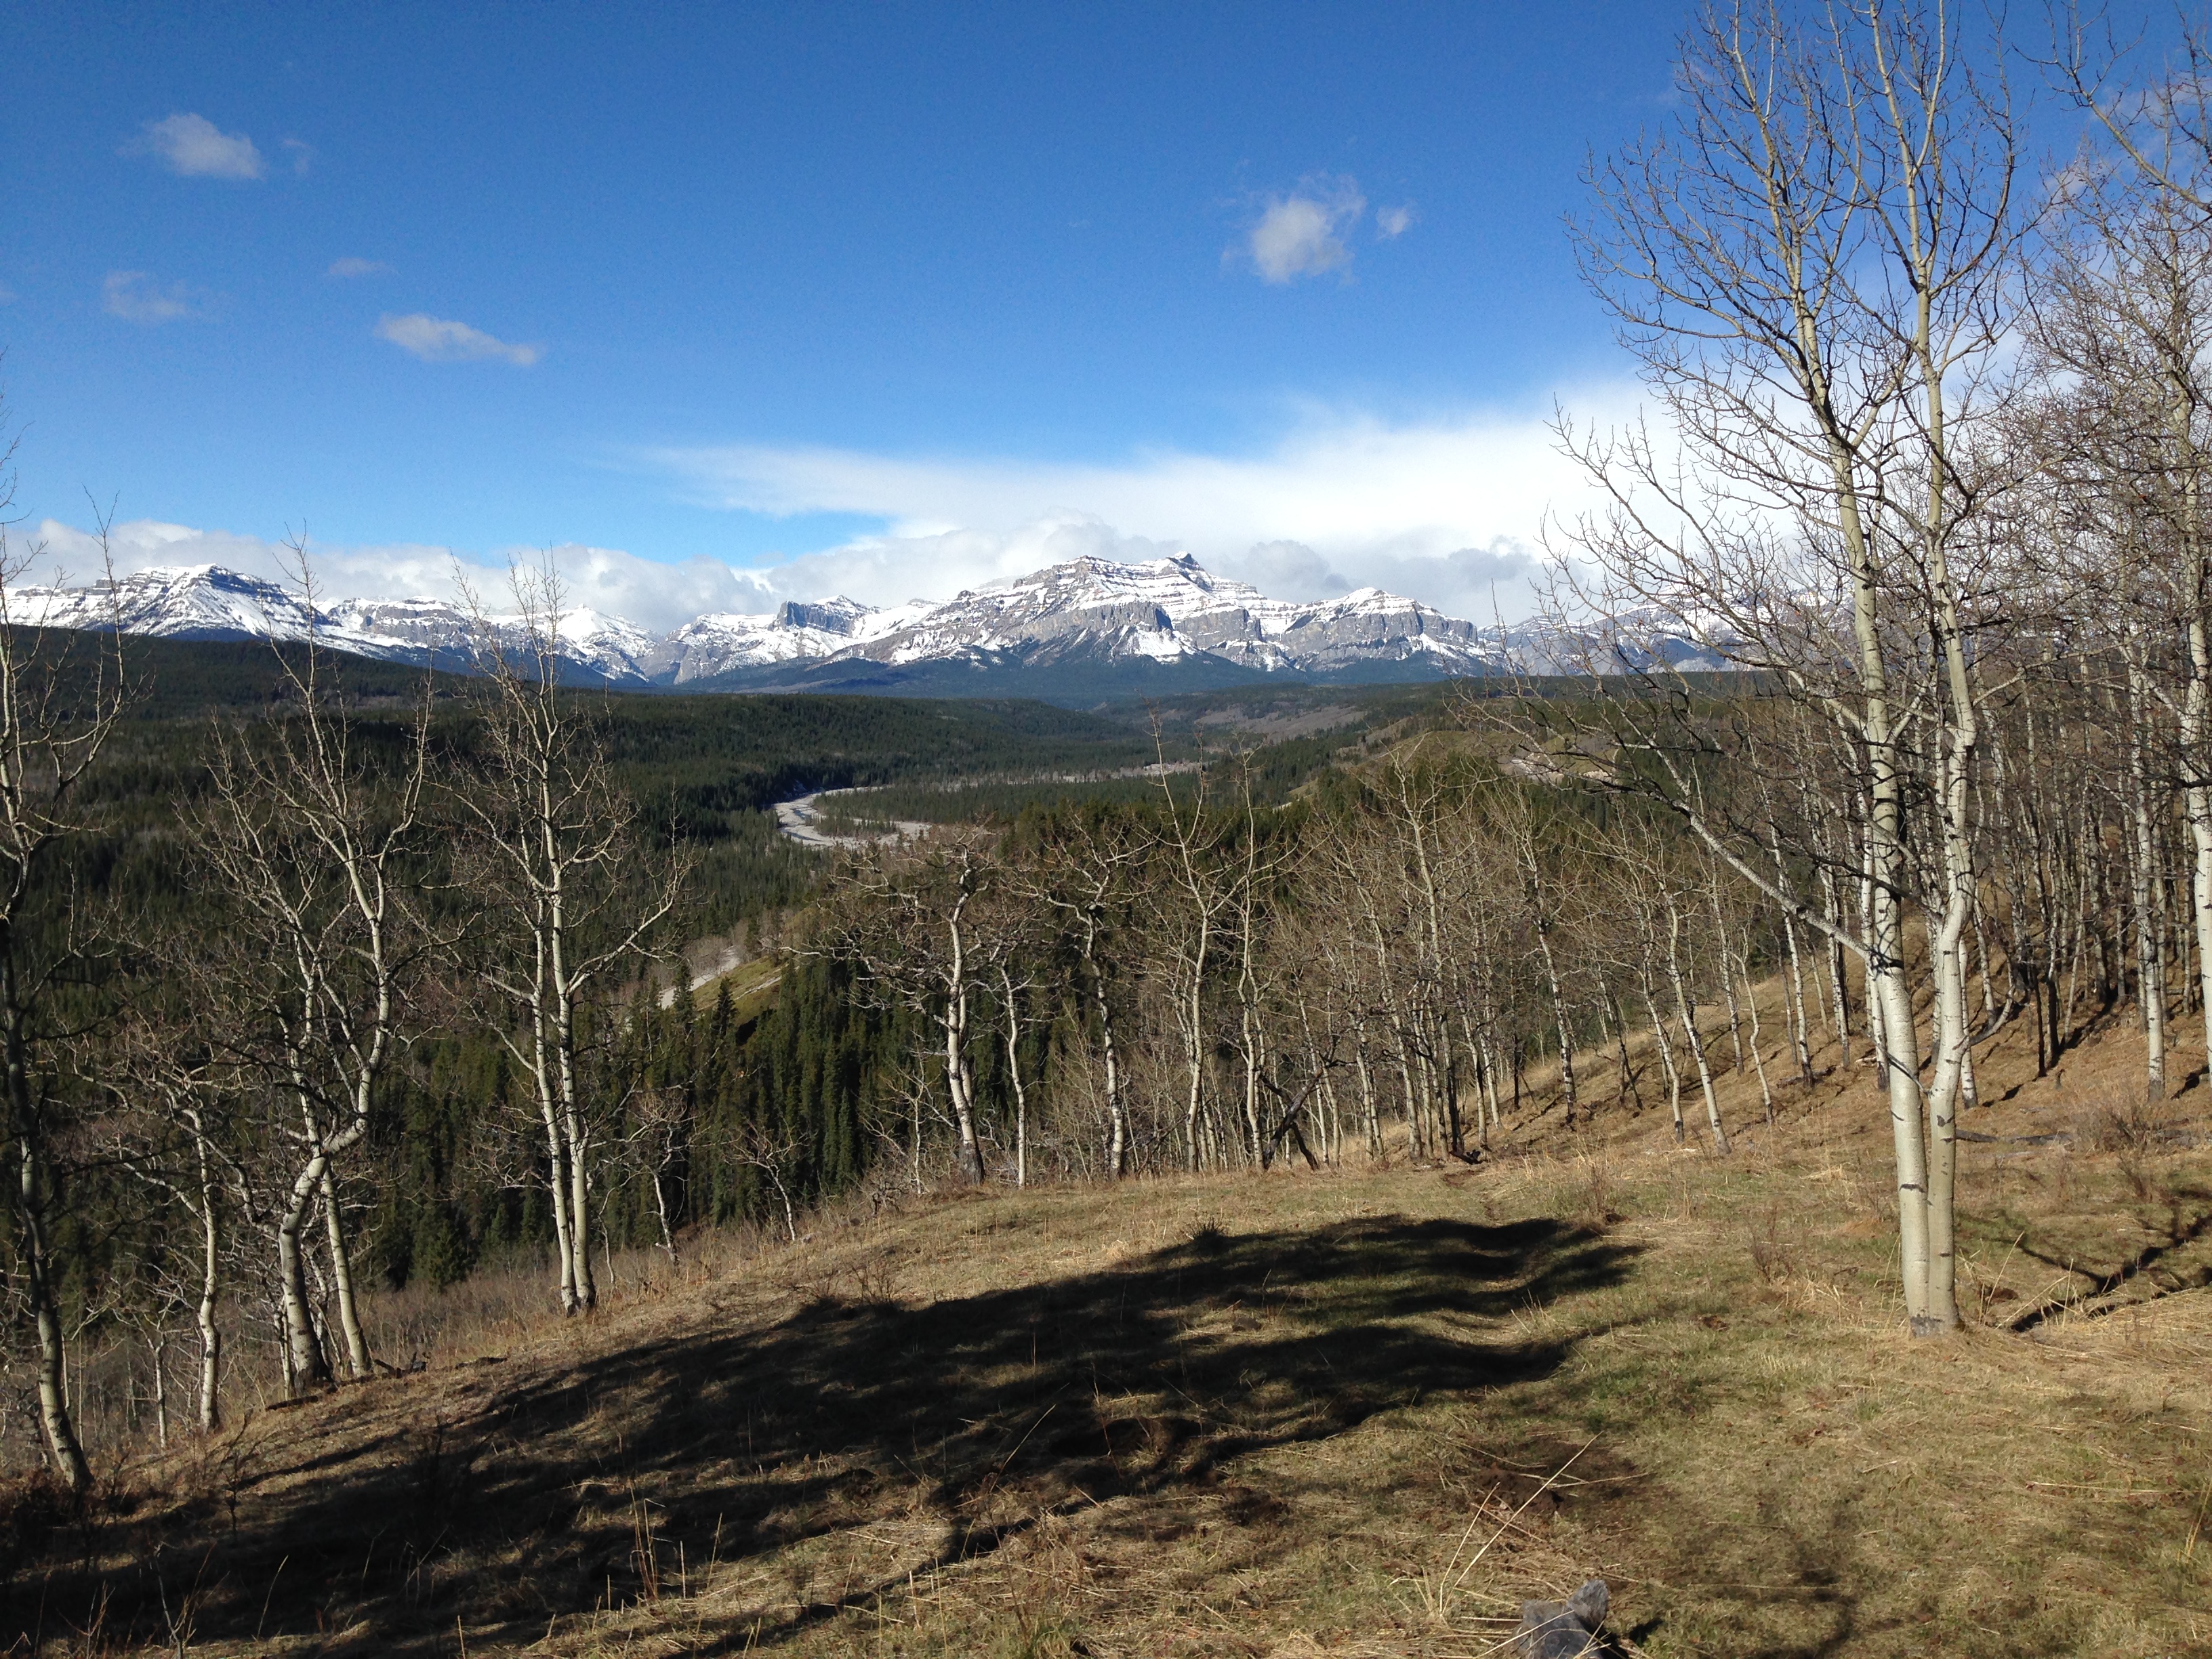
You will follow the ridge and mainly be working your way northwest. There are a series of uphill sections and false summits, but the wonderful views of the valley and the mountains will be your continuing reward for the grunt effort.
After about 3 – 3.5km, you will finally reach the true summit of the ridge and more views. If you follow one of the side paths you may even discover a lean-to someone has built. The wind was rather strong when I was here so I considered using the lean-to as a shelter while taking a water break, but opted to go a little further down the trail first.
After reaching the high point of the ridge, you can either return the way you came or continue and make a loop. I opted to venture on. The trail starts to move in a mostly northern direction here, with minimal elevation change. You can tell most people must turn around, because the trail is narrower and more overgrown. You start to feel like you are really far away from civilization at this point.
It’s a feeling that only lasts for about 600m or so. Soon you will emerge on a cutline. Turn to your left (west) and start down. You’ll loose almost all of the elevation you gained in just over 1km of hiking. The cutline appears to be used by dirtbikers on a regular basis, although I didn’t encounter anyone else on my trip. If you didn’t follow my advice and decided to do the loop in a clockwise direction instead, this is where you’ll do all your ascent — a grunt up a boring cutline with no views to speak of.
When you get down to the bottom, you will come to a simple creek crossing. I knew this is where I wanted to turn to the south and follow the creek. My trail maps showed a trail, but I never found it. I suspect if I had carried on a bit more to the west I would have come across it. My guess is the trail maps in my GPSr were transcribed from a paper map and thus the trail I was looking for didn’t quite appear in the proper place on my unit.
Nonetheless, the going was fairly easy and I knew I only had about 300m of distance to cover before I would run into Lesueur Creek and the main trail again. At this point I was hit with a light snow squall that moved through the area. I was quite fortunate that it quickly passed overhead to the SE and I was soon back in sunshine again. For a moment I thought it was going to be a wet walk back to the car.
This part of the hike is the most boring. It’s about 3km back to the plateau where we made the decision to do the loop counter-clockwise. If you’re in bad shape like me, your legs will appreciate the break from all the ascent/descent you’ve done to get here.

Following the trail back along the creek towards the car.

Looking north towards the ridge — it wasn’t long ago I was standing up there.
The trail will eventually leave the creekbed and follow along the lower part of the ridge. You’ll get plenty of chances to look up and see the spots you had been standing earlier. Eventually you’ll come back to the plateau and you’ll do the final descent and then the short walk back to the trailhead.
My track log shows my loop was about 9km long, with a net elevation gain of approximately 300m. My total ascent was closer to 450m, with all the up and down along the ridge. Total trip time for me was only three hours, including all the stops I did for Geocaching and with plenty of “breath catchers” on the way up.
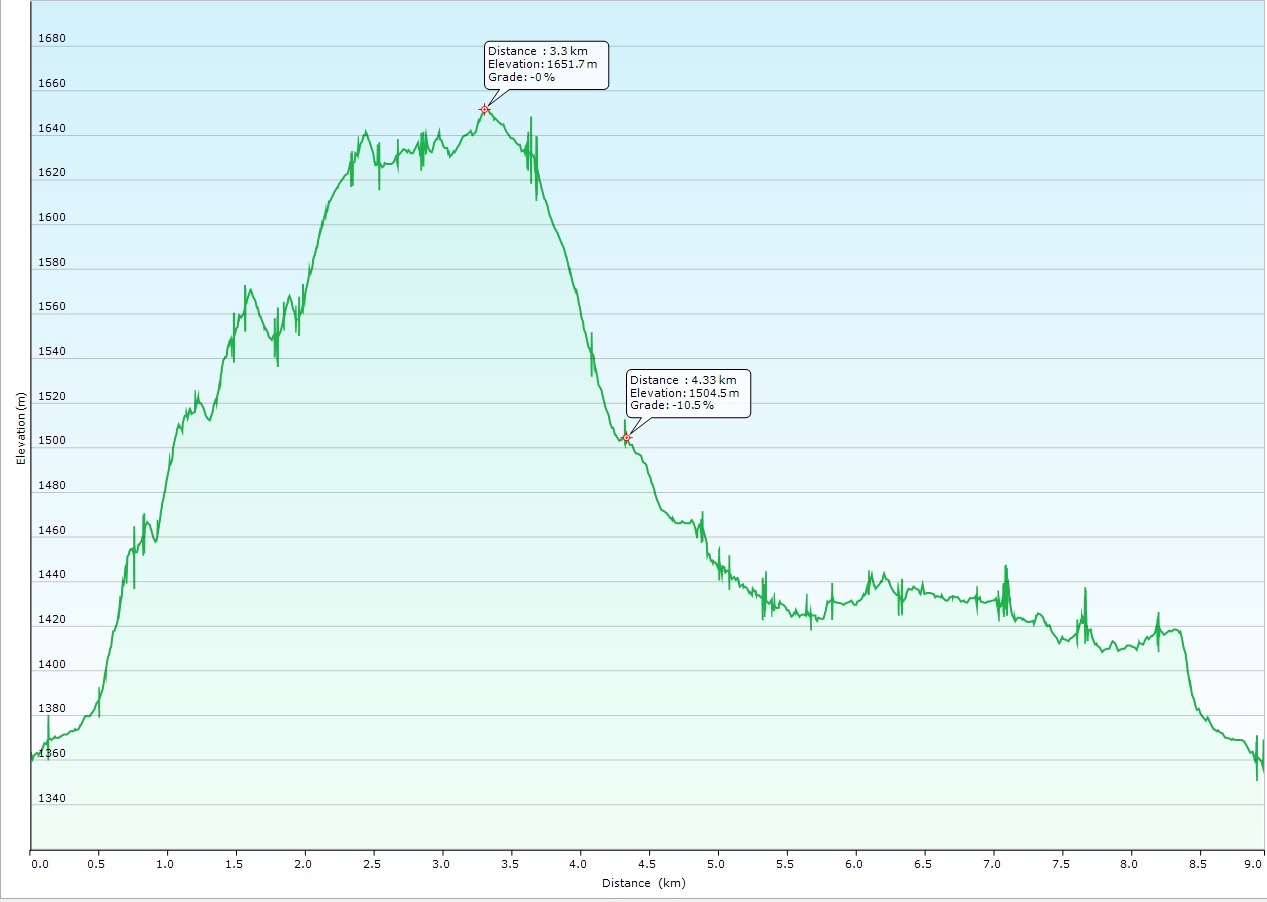
My Elevation Profile


Looks like a good option for our first hike of 2015. Thanks for the detailed directions and trail description.
LikeLike
I’ve had this ridge on our radar for some time. Looks like a new addition to the to-do list.
LikeLike